Zoom Installation and Usage
PDF Version Download: Zoom Directions for Teachers and Presenters
-
Installing Zoom
You can install Zoom by visiting https://ufl.zoom.us/download#client and downloading the Zoom Client for Meetings. Zoom also has mobile apps for iOS and Android that you can download for your devices.

-
Log into Zoom
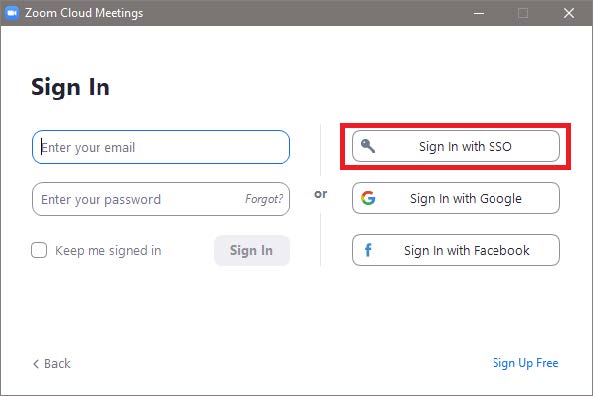
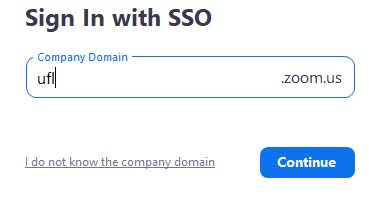
When you open Zoom's app, click Sign In with SSO and enter ufl in the field. Then you will be able to login with your UFL credentials.
-
Schedule a Meeting
You can schedule a meeting through Zoom’s website or Zoom’s app. However, we advise that you schedule meetings through Zoom’s website as there are more options displayed than in Zoom’s app.
You will first need to log into Zoom by visiting https://ufl.zoom.us/, selecting UFL SIGN IN, and signing in with your UFL credentials.
At the top-right, you should see SCHEDULE A MEETING. Clicking this option will bring you to a page to select the options for your meeting.

-
Meeting Options
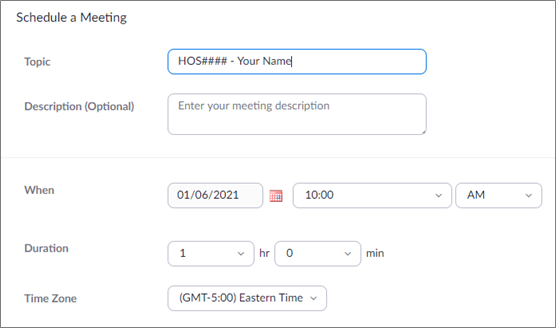
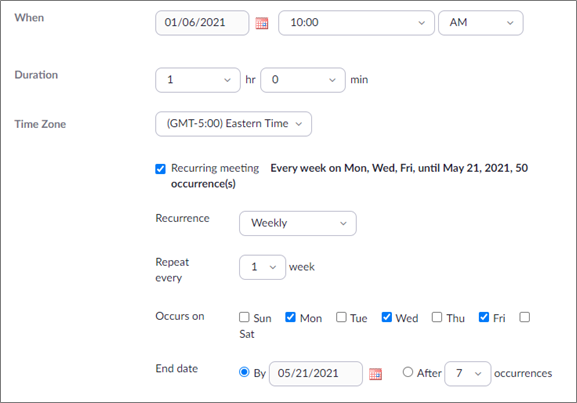
For Topic, we would advise using this naming scheme, Course Code – Your Name. For Date, you would enter the start time and the duration. We would advise rounding to the nearest preceding half hour for setup and testing.
For recurring meetings, you would check the box and set the recurrence to the appropriate option, select the days of the week this meeting will occur (For classes, a Weekly recurrence would probably be appropriate.), and then set when these recurring meetings will end. REMINDER: Be mindful of when classes end to be sure to allow for review sessions if needed.
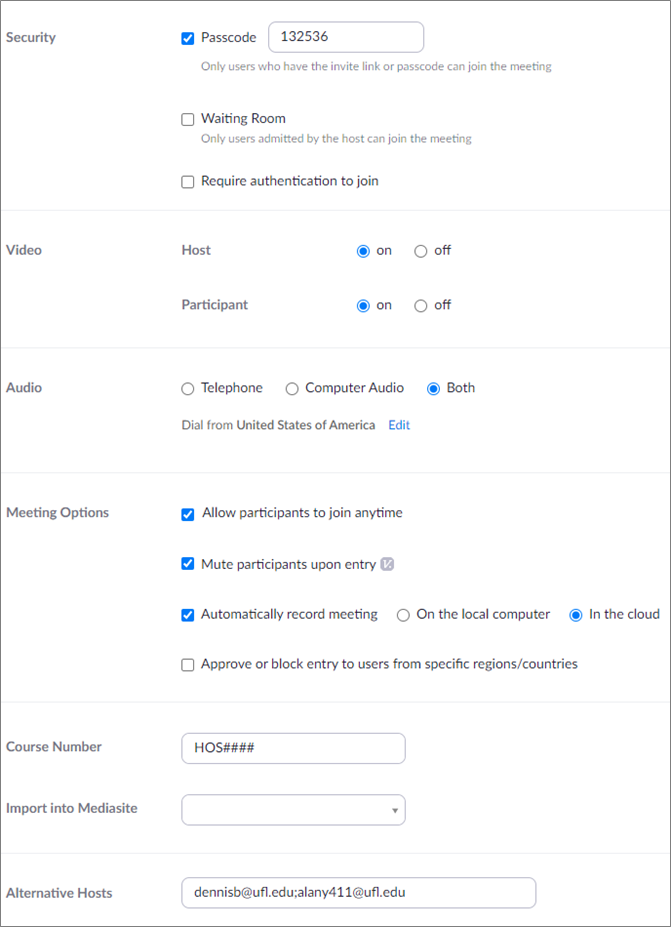
Below are some other meeting options and their descriptions. REMINDER: As of Sept. 27, 2020, it is required that Zoom meetings have a Meeting Passcode or Waiting Room set.
- Passcode – Before the users can join the meeting, they will need to enter the passcode
- This password can be emailed to your attendees with a reminder of the importance of not sharing the password with others
- Enable waiting room – Allows the host to control when attendees can join the meeting
- With this option, the host can admit attendees one by one or hold all attendees in the waiting room and admit them all at once. (this option is useful for interviews using the same Zoom link)
- Require authentication to join – Makes users log into Zoom.
- We usually leave this option unchecked by default.
- Allow participants to join anytime – Allows attendees to join before the host starts the meeting
- We usually leave this checked by default.
- Mute participants upon entry – Mutes attendees when they join (they can unmute themselves)
- We have learned by experience to do this for seminars. It may or may not be helpful for classes.
- Record the meeting automatically – Starts recording the meeting as soon as someone joins.
- If it is not set to record in the cloud, it will record it to your computer only.
- We recommend this option for classes so that students who miss the class will have a recording that they can watch.
- PLEASE MAKE SURE IT IS SET TO RECORD: IN THE CLOUD
- If it is not set to record in the cloud, it will record it to the computer being used only.
- Alternative Hosts – This allows other people to assist with managing the meeting. You can add multiple hosts by separating their emails with a semicolon (;).
- Dennis Brown’s email: dennisb@ufl.edu
- Alan Yang’s email: alany411@ufl.edu
We recommend the options in the image below:
- Passcode – Before the users can join the meeting, they will need to enter the passcode
-
Sending Meeting Invites
After saving the settings for your meeting, you will be redirected to a page that lists information about your meeting. There is a section called Invite Attendees that will provide the Zoom link for your users. You can either just copy the Join URL portion or click Copy the invitation to include other ways to connect like by phone or Skype for Business. Then you would paste the copied text to the body of an email and send to your attendees. REMINDER: If you set a Meeting Passcode, include that password in your email even though it is already in the Invitation Link.

-
Share Your Screen for Presentations
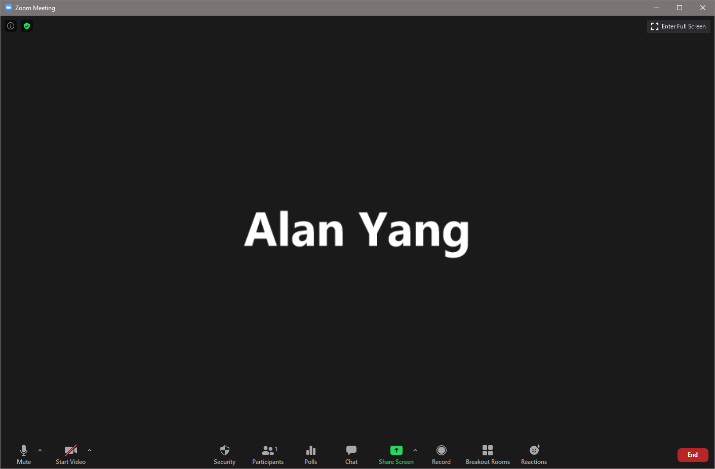
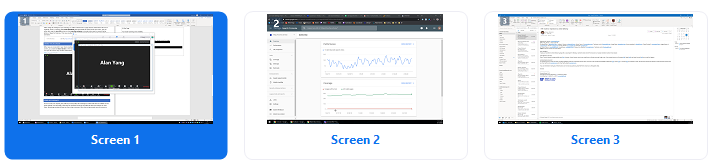
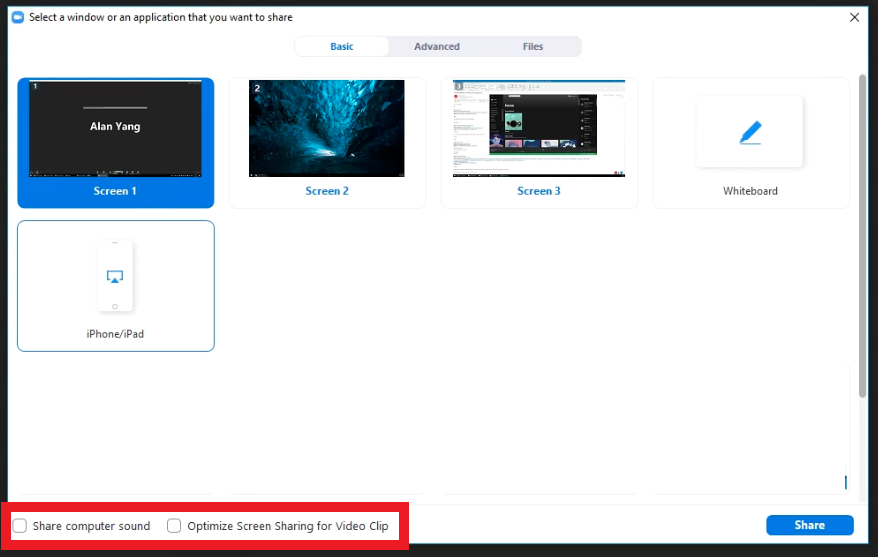
When you are connected to your Zoom meeting, you will see a window like the image below. To share your screen, you would click Share Screen on the bottom taskbar and then select the screen you want to share. We recommend sharing a screen instead of an individual program because when sharing an individual program, complications can occur. REMINDER: Make sure you do not have any sensitive information opened on your screen before sharing.
-
Share Your Screen for Video with Audio
If you are sharing your screen to show a video that has audio, you will need to check Share computer sound and Optimize Screen Sharing for Video Clip when sharing your screen. This will allow your attendees to hear the sound from your computer. REMINDER: Make sure you do not have any sensitive information opened on your screen before sharing.
-
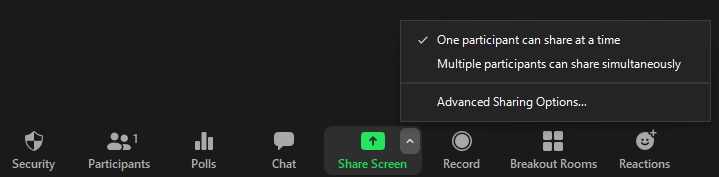
Allow Multiple Attendees to Share Their Screen
-
Attendees Sharing Their Screen
If you have One participant can share at a time enabled then to allow attendees to share their screen, the person currently sharing their screen would need to stop before someone else can share. They can do this by clicking Stop Share on the floating taskbar. This will then allow another attendee to click the Share Screen button on their Zoom client to share their screen.

-
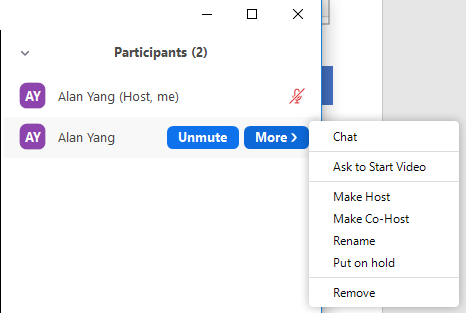
Managing Attendees (Participants)
You can manage your attendees by clicking Manage Participants in the Zoom taskbar. A sidebar with your attendees should appear and you can mute/unmute or click More for more options. We would not recommend making anyone a Host as they would be in full control over the meeting.
-
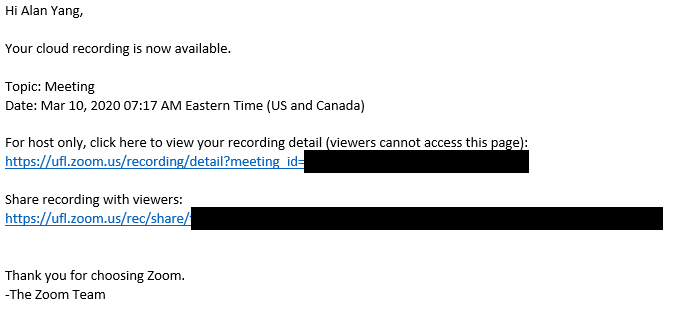
Send Recordings
If your record your meeting, they will be processed after the meeting has ended and then be available on the Zoom website. You will need to then post or email the link to the recording to those who request or need them. Recordings usually will take less than a day to process. After they are processed, you will receive an email like the one below. The link that you would share would be the second link labeled Share recording with viewers.
-
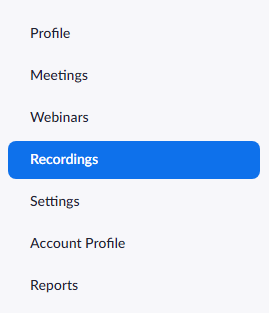
View All Recordings
To view all your recordings, you will have to visit https://ufl.zoom.us/, login, and then go to Recordings on the left sidebar. After you select Recordings, you will see a page with all your Cloud Recordings.